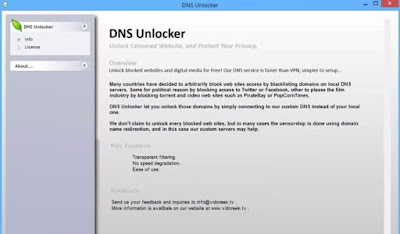
What is DNSUnlocker?
DNSUnlocker is an ad-supported program that enables to generate lots of pop-up ads on your screen to annoy you. It often comes into users' PC via third party programs. Once installed, this adware shows its annoying traits:
- It modifies the default settings of your common used web browsers and change your DNS.
- You get bombarded with nonstop pop-ups when you are surfing the web.
- You are redirected to unknown web pages against will.
- It offers more chances for malicious infections to get access into your PC.
- It declines your PC performance day after day.
In a word, the longer DNSUnlocker stays on your PC, the more troubles it will cause. You may suffer the slow running speed, windows freeze, unstable internet connection, and many other PC problems. Therefore, it is advisable to get rid of DNSUnlocker immediately in case of any further damage.
How to remove DNSUnlocker easily and thoroughly?
Method 1: Manually Remove DNSUnlocker
Method 2: Automatically Remove DNSUnlocker (Highly Recommended)
Optional Step: Fix Slow PC Performance by Using RegCure Pro
Method 1: Manually Remove DNS Unlocker
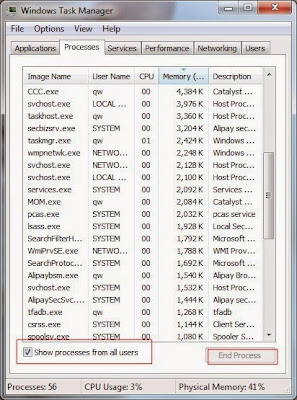
1. Stop DNSUnlocker associated running process in Windows Task Manager.
Press Ctrl+Shift+Esc together to open Windows Task Manager, click Processes tab, find suspicious running process and your internet browser's running process, select them one by one and then click the End Process button.
2. Uninstall DNSUnlocker in Control Panel.
Windows 10:
1) Tap the Windows key + I to launch Settings.
2) Click on Control Panel.
3) Open Uninstall a program.
4) Delete suspicious programs.
Windows 8 or Windows 8.1:
1) Press the Windows key + Q.
2) Type Control Panel and click the icon.
3) Go to Uninstall a program and remove suspicious programs.
Windows 7 or Windows Vista:
1) Launch the Start menu and select Control Panel.
2) Access Uninstall a program.
3) Remove suspicious programs.
Windows XP:
1) Access the Start menu.
2) Open Control Panel.
3) Launch Add or Remove Programs and eliminate suspicious programs.
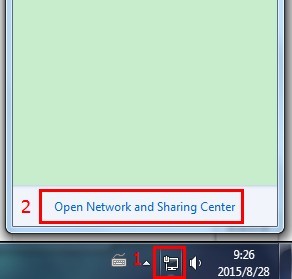
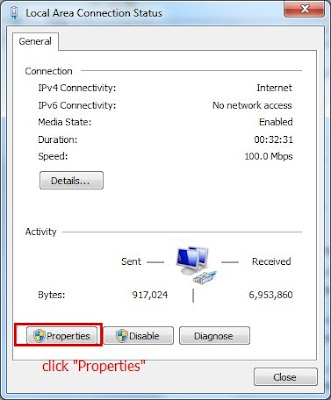
3. Reset your DNS settings
1) Open Network and Sharing Center
2) Click "Local Area Connection"
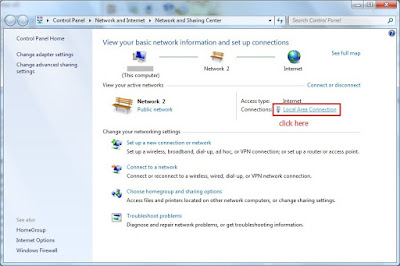
3) Click "Properties"
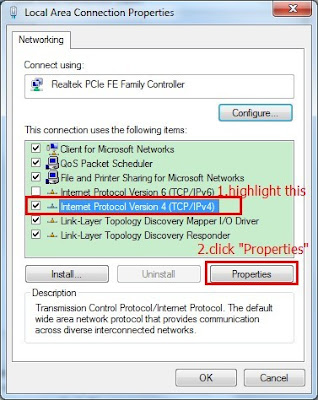
4) Now under the Networking tab, scroll down until you find "Internet Protocol Version 4 (TCP/IPv4)", and then highlight that then click on "Properties".
Both options in this windows should be automatic! The first option should be set to "Obtain an IP address automatically" and the second should be set to "Obtain DNS server address automatically!"
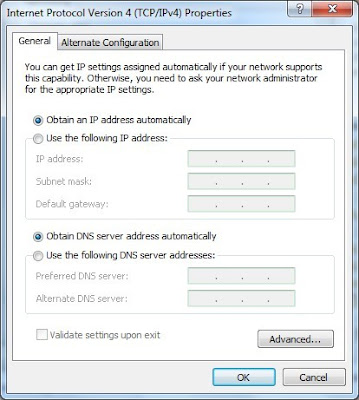
5) Once you are finish, click "OK" and close the windows.
Note: If your computer belongs to a company or you actually have a custom DNS then this would not apply to you.
4. Remove DNSUnlocker extension or add-ons from your browsers
Internet Explorer:
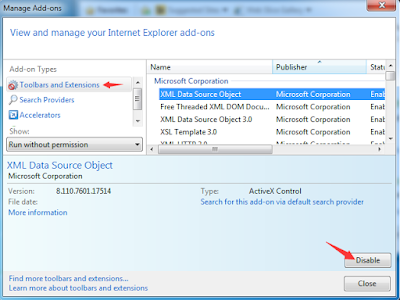
1) Start Internet Explorer and choose "Tools" >"Manage add-ons".
2) Choose "Toolbars and Extensions", then find and remove related programs.
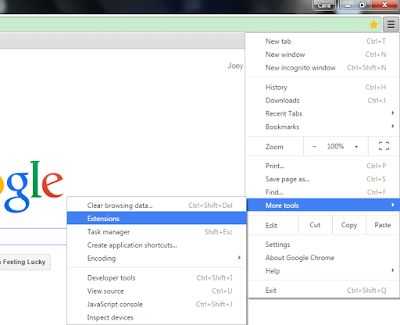
Google Chrome:
1) Open Google Chrome, click on the "Customize and control Google Chrome" icon in top right corner.
2) Select "Settings" > "Extensions", then find and delete add-ons.
Mozilla Firefox:
1) Start Firefox and choose "Tools" > "Add-ons"> "Extensions".

3) Restart Firefox to complete the process.
- Want a Quicker way to resolve the DNSUnlocker issue?
- Click here to Download Recommended Tool.
5. Delete all the infection associated files
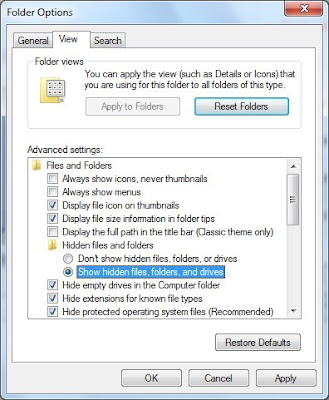
1) Open Control Panel in Start menu and search for Folder Options. When you're in Folder Options window, please click on its View tab, tick "Show hidden files and folders" and uncheck "Hidden extensions for known files types" and then click"Apply".
2) All the infection associated files listed below need to be removed:
%CommonAppData%\<random>.exe
C:\Windows\Temp\<random>.exe
%temp%\<random>.exe
C:\Program Files\<random>
6. Remove all the infection registry entries
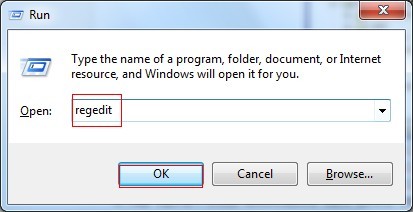
Hit Win+R keys, type "regedit" in Run box, and then click "OK" to open Registry Editor
Delete them all:
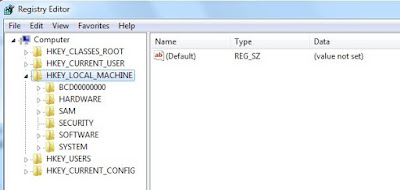
HKEY_LOCAL_MACHINESOFTWAREsupWPM
HKEY_LOCAL_MACHINESYSTEMCurrentControlSetServicesWpm
HKEY_CURRENT_USERSoftwareMicrosoftInternet ExplorerMain "Default_Page_URL"
HKEY_LOCAL_Machine\Software\Classes\[adware name]
HKEY_CURRENT_USER\Software\Microsoft\Windows\CurrentVersion\Uninstall\[adware name]
7. Restart your computer to take effect.
Method 2: Automatically Remove DNSUnlocker (Highly Recommended)
What can SpyHunter do for you?
- Give your PC intuitive real-time protection.
- Detect, remove and block spyware, rootkits, adware, keyloggers, cookies, trojans, worms and other types of malware.
- Spyware HelpDesk generates free custom malware fixes specific to your PC
- Allow you to restore backed up objects.
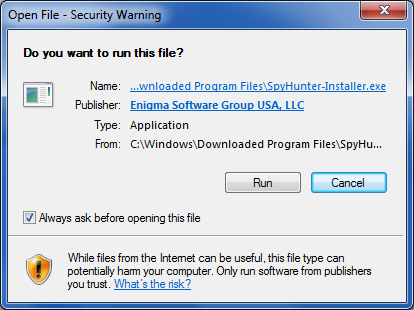
1. Click on the below button to free download SpyHunter on your PC.

2. Click the "Run" button to enter the setup program and follow the installation steps until setup is complete.
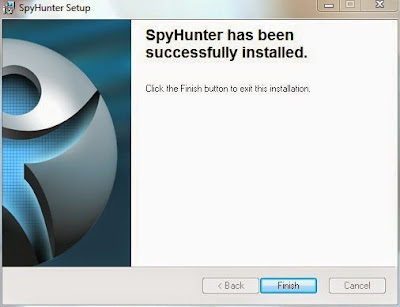
3. When the installation is complete, click the "Finish" button to exit the installation.
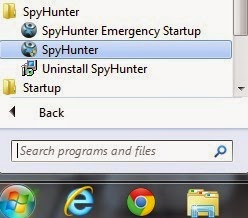
4. If SpyHunter does not automatically start, click the icon on your desktop or Start menu to open it.

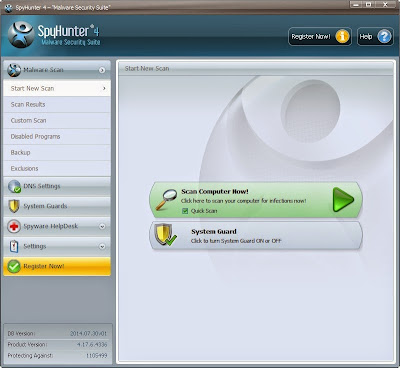
6. The first scan will take some time, please be patient while waiting for the scanning result.
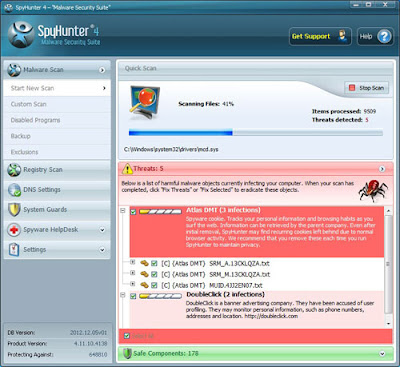
7. After the scan is done, you can see that all threats are successfully detected. Check the "Select All" box and then click the "Remove" button to fix all threats in your PC.
Note: SpyHunter's free version is only for malware detection. To remove the malware threats on your PC, you will need to purchase SpyHunter's malware removal tool.
Optional Step: Fix Slow PC Performance by Using RegCure Pro
What can RegCure Pro do for you?
- Fix system errors
- Remove malware
- Improve startup
- Defrag memory
- Clean up your PC
1. Click the below button to download RegCure Pro to your PC.

2. Click the "Yes" button to enter in installation process and then follow the instruction to install the program step by step.

3. When the program is successfully installed, double click on its desktop shortcut to open it. On the Overview tab, check all the scan settings and then click on the "Click to Start Scan" button to run a system scan on your computer.
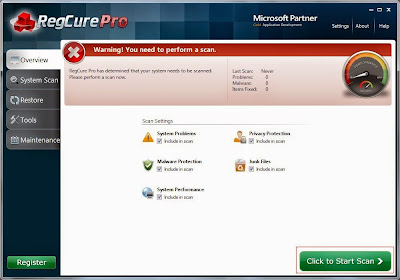
4. The first system scan will take some time, please be patient. The screenshot of the system scan progress is shown below.

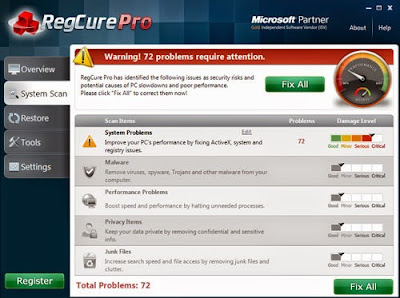
5. When the system scan is done, click on "Fix All" button to completely remove all the performance problems in your computer.
Note: The free version of RegCure Pro is only for malware detection. To remove the malware and corrupt files on your PC, you will need to purchase its full version.
Below is a Recommended Video:
In Summery:
DNSUnlocker is really a trouble maker. If you are unlucky to have this adware installed on your PC, you should take action to uninstall DNSUnlocker from the infected PC immediately in case of further troubles.
Download SpyHunter to remove DNSUnlocker quickly.
Download RegCure Pro to optimize your PC easily.
Good Luck and be safe online.
No comments:
Post a Comment